What is a Macro?
A Macro is code which can be run to automate a tasks. This general differs from standard programs as a macro is normally run through or targets an existing program to automate actions that would normally be done manually i.e. in FreeCAD to control a simulation or animation.
Why Do We Need One For Animation
So why do we need these in animation? There are a number of ways to create animation and some additional workbenches take over the need for macros, allowing for a process of recording the movement and playback these are fine for exploding and imploding assembles. But if we want to go beyond seeing how things fit together and explore subject areas such as simulating a suspension system tackling bumpy roads then it is inevitable that we will need to write at least some code. The aim is to write as little as possible and allow FreeCAD to do the hard work.
Your First Macro, 'Hello World!'
So it's time to write your first macro! It's not going to do anything exciting (we are saving that for later lessons) but you will learn how to write, save and run a macro and how to start using the panels we previous made visible.
We are going to be creating code which programmers use as the defacto starting point when trying any new language; Hello World!
Make sure you have both the Python console and the report view open.
Click in the Python console. You will notice that there will be a flashing cursor next to the 3 chevrons. This is the python interpreter awaiting you to supply a command.
Type the following line exactly as is taking careful not of case and notice there is no preceding or trailing spaces :
print("Hello World!")
Now hit enter and observe.
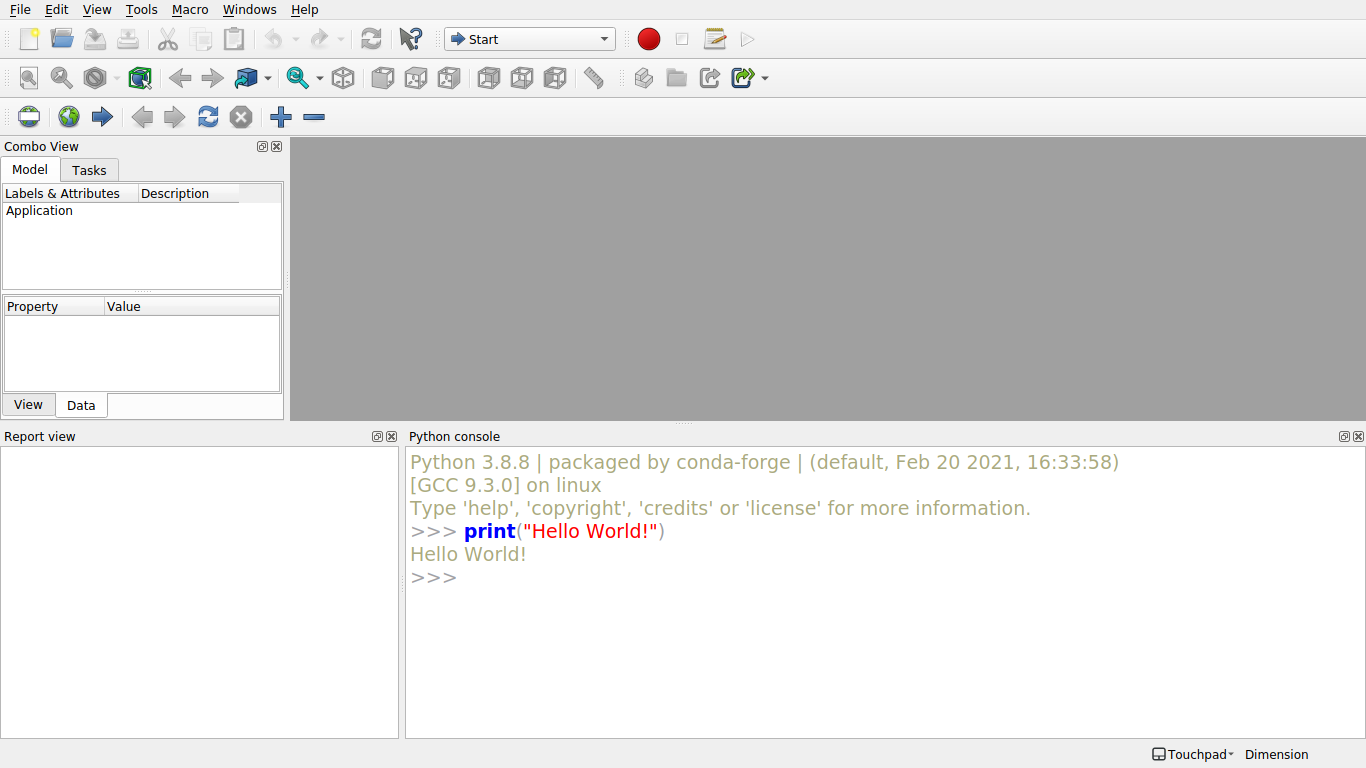
We can see that 'print' is highlighted in blue. This is an internal command which prints the passed text supplied in quotes to the Python console. The text is passed as whats know as a parameter which we have passed within the brackets of the command. Note the output, directly under the line of code. This is what known as 'call and response'. You issue a command and the result is echoed. Note that nothing is being shown in the report console.
Lets try moving this to a file. Form the top menu click on:
Macro > Macros ...

You will see the Execute Macro popup.

Note the 'user macros location'? We discussed how to customise this in Lesson 0
Let's create a new macro, click on the 'Create' button and enter a name for the macro. You can see what name I have chosen below but it's up to you. Just remember to keep this descriptive so we can find it later.

Hit the OK Button The macro editor window will appear.


FreeCAD
now add a dot
FreeCAD.
The code completion starts kicking in. The Python console is giving you access to the FreeCAD API exposing its objects and functions. Let's finish the command, you will see the code completion continuously make suggestions;
FreeCAD.Console.PrintMessage("Hello World!")
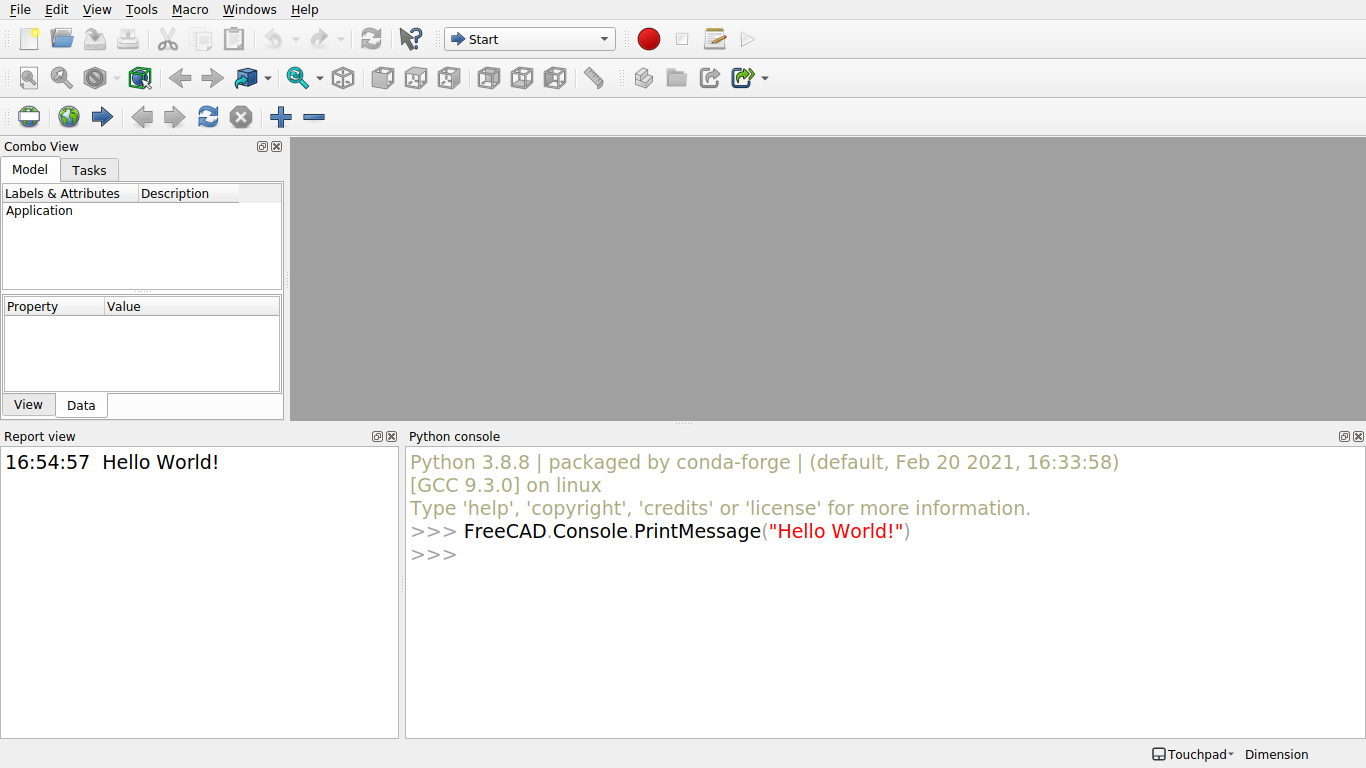
Notice any difference? We have no response back in our Python console and we have a response in our report view. This is a different command that though creates the same output it targets the report view which is part of FreeCAD's user interface. This means if we share our macro with someone else we can guarantee our messages will be seen even if they have disable the settings to show output.
Quotes
Before moving on to something much more interesting it's worth going over quotes used in the Python language
If we change our line slightly and change the double quotes to single quotes so:
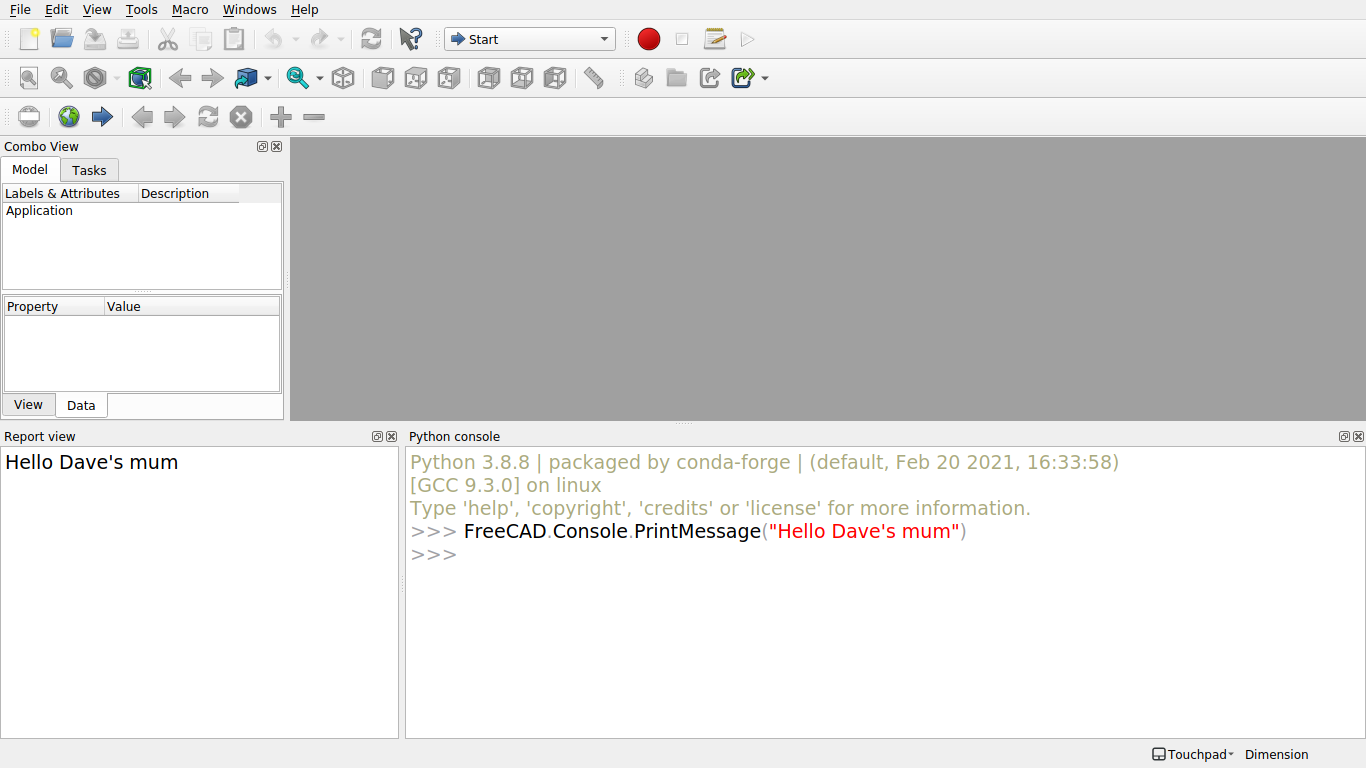
FreeCAD.Console.PrintMessage('Hello World!')
It still works, what's the difference? Well it's down to best practices and personal preference. Best practices encourage us to use the double quotes for text and single quotes for anything to be used as an identifier. Take the following
myString = "Hello World"
myString is a variable of type string (more on that later) and "Hello World" is the value that is assigned to it; a string literal. We could pass the text "Hello Dave's mum" using the double quotes but change the surrounding quotes to single; 'Hello Dave's mum' we get an error.

This is what's known as a syntax error. The syntax of our command is incorrect. We can see straight away that something isn't right; look at the colours. The text passed to the print message command is partly in red and partly in black. We have a unpaired quote. In programming quote often define a identifier or some text. And if the quotes are surrounding text then the quote must pair up correctly. When we use double quotes we allow for the single quote.
So what happens when we want to use double and single quotes in our text? Well this is where triple single quotes come in:
print('''"That's great", she exclaimed.''')
So what quotes do we use?
It is best to follow some simple rules when deciding what quotes to use:
Single quotes, i.e 'something':
Anything that behaves as an identifier, i.e : objName = 'myBox' or any text containing a double quote i.e 'My name is "Hugo" '
Double quotes, i.e "Something":
General text
Just remember these are not hard and fast rules and as long as your consistent the it doesn't really matter.
Congratulations! You have created your first macro! It's not exactly exciting but it's the start to our journey and lays down some basic skill that we will need.
Comments
Post a Comment