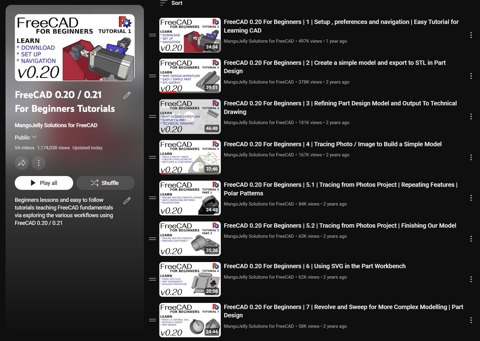
Welcome to the total beginners course to FreeCAD 0.20. In this is a two part lesson we will practice our tracing skill in the form of a mini project. Using the below reference photos we will create a more complex part which will consist of repeating features. We will utilise the symmetry tools to ease construction in both FreeCAD sketcher and Part Design workbench.
This project work will help teach the fundamentals of freeCAD allowing a understanding of the basics but delivering this information via teaching you different workflows.
In this tutorial we will be tracing photos imported into FreeCAD via the image workbench
https://wiki.freecadweb.org/Image_Workbench
Do you want to purchase the complete series along with others and keep forever? Check out my shop
The story of this tutorial
The idea and first attempt at creating this tutorial was back in FreeCAD 0.18. The physical part itself, well, I have no idea what really it is, it looks like something from some flat pack furniture (I believe it was left over from a kitchen fit that was done) and it ended up in my in-tray for some months. The first attempts at creating the tutorial didn't got well. I first managed to record the whole tutorial without sound, then I had a computer crash and lost the second recording as it wasn't stream to disk, followed by me losing the part which lead to me giving up on the tutorial until it re-appeared many months after. At the time freeCAD had moved on to 0.19 and I started again only to have my laptop die and videos being corrupted. Determination only lead to the tutorial finally being completed and released.
Tips when capturing reference images
It's import to be mindful of how you capture your images. Quality, composition, lighting, etc will all be a factor when it comes to the stage importing and tracing. Here are some tips to save you time and frustrations:
- Make sure you have a known scale. Either you know the exact size of part of the subject or there is something in the image you can use. Remember perspective will reduce this scale if the subject has depth. You will need this scale so it can be defined in freeCAD.
– To get a decent profile of the subject the camera needs to be parallel to the object. Use a tripod, stand and / or take a photo standing from afar but zoom into the subject with the lens. The errors in perspective reduces the further you are away.
- Take photos from the individual planes; top, right, front along with the opposites; bottom, left, back.
- Take additional photos from as many angles as possible, zooming in on detailed parts. You want to capture as much information as possible otherwise you may get stuck modelling a feature.
– Use a contrasting background when taking photos of your subject.
– Make sure you capture images in a lossless high-resolution format, you can always reduce the detail later but you can't increase it. By that time the subject may no longer be available.
- Take a high resolution video, moving around the object, up and over and again zooming into the detailed parts. This can help you to visualise certain features. The individual frames serve as additional reference images and can be extracted from the original video and loaded into FreeCAD if needs be.
– It is harder to find the edges of your subject when there are excessive shadows or some of the object is in shade. So make sure you have adequate lighting and it is positioned in a way to reduce shadowing.
- If possible use a flat-bed scanner.
- Resize the image down afterwards to take the load off the CAD program before using the image workbench so refine the scale from a reference .
A Quick Step-by-Step Guide
If you’re learning FreeCAD and want to speed up your modeling workflow, mastering the polar pattern technique is a game-changer. Instead of modeling repeated features one by one, you can model a single section and then use the polar pattern tool to replicate it evenly around a central axis, saving you loads of time and effort. Note: This is a summary of the key steps from the video
Why Use Polar Patterns?
Polar patterns are especially useful for features that are repeated symmetrically in a circular layout like bolt holes around a flange, fan blades, or any design with rotational symmetry.
Step 1: Prepare Your Reference Image
-
Import your part’s image into the Image Workbench (Note: If following along in version 0.22 / 1.0.0 and above the image workbench is no longer available. Please use file > import)
-
Scale the image accurately by measuring a known dimension in the image and adjusting accordingly.
-
Position the image on the correct plane (usually XY for a top view).
Step 2: Create a New Body and Sketch
-
Switch to the Part Design Workbench.
-
Create a new Body, then a new Sketch on the plane matching your image.
-
Move the image plane slightly behind your sketch for easier tracing.
Step 3: Sketch the Basic Segment
-
Instead of drawing the full part, focus on tracing just one segment of the repeated feature.
-
Use construction geometry to set up lines that define the segment boundaries (e.g., 90° for four repetitions).
-
Add arcs, lines, and constraints to define your shape accurately.
-
Fully constrain your sketch to prevent errors downstream.
Step 4: Create a Pad (Extrude) from the Sketch
-
Use the Pad tool to extrude your sketch to the desired thickness.
-
Check that your sketch is fully constrained unrestrained sketches help reduce errors during padding.
Step 5: Apply the Polar Pattern
-
Select your padded feature.
-
Click the Polar Pattern tool in the Part Design Workbench.
-
Set the number of occurrences (e.g., 4 for a quarter-circle repeated four times).
-
Ensure the axis of rotation is correctly set (usually the Z-axis or normal to the sketch plane).
-
Enable the Refine option to remove unnecessary edges created by the pattern.
Tracing Images & Completing a Part Design
In this part, we continue building a simple part by tracing reference images using the Image Workbench and transitioning into the Part Design workflow.
Step 1: Setting Up Your Project
Start by saving your project as a new file. Then delete the previous polar pattern and pad to get back to the base sketch.
Make sure the body is active by right-clicking and selecting Toggle Active Body. This ensures all new features stay inside the same body.
Step 2: Import and Scale Reference Images
Import the Base Image (XY Plane)
-
Go to the Image Workbench
-
Create an image plane
-
Select
base.jpeg -
Place it on the XY plane
-
Use the ruler in the image to scale it (e.g., 0 to 14 cm = 140 mm)
Rename this plane to BasePlane.
Import the Side Image (XZ Plane)
-
Add
side.jpegon the XZ plane -
Scale it using known measurements from the base image (e.g., width = 48 mm)
-
Flip and transform the image using the Transform tool to align it correctly
Rename this plane to SidePlane.
Step 3: Start Sketching the Base Shape
Create a new sketch on the XY plane and sketch the rectangular base, matching it to the image dimensions:
-
Length: 48 mm
-
Height: 51 mm
Use symmetry constraints to center your sketch, and place circles for holes:
-
One with a diameter of 5.5 mm
-
Another with 4 mm
Use horizontal and vertical constraints to align and fully constrain the sketch.
Step 4: Pad and Position the Features
Use the Pad tool in Part Design to extrude your base sketch:
-
First pad: 3.5 mm thick
-
Second pad on the top face: 2 mm
-
Use measurements from the reference image to guide pad distances
Adjust sketch placement using the Attachment offset in the Data tab when needed.
Step 5: Create and Apply the Polar Pattern
Select your pad and apply a Polar Pattern:
-
Axis: Normal to sketch
-
Occurrences: 4
This duplicates the feature evenly around the center, completing the circular layout.
Step 6: Add the Side Support Feature
-
Create a sketch on the side face
-
Use external geometry to anchor your new sketch
-
Draw an arc and two lines to shape the support bracket
-
Set constraints:
-
Height: 32 mm
-
Length: 40 mm
-
Arc radius: 72.5 mm
-
Position the sketch correctly using Attachment > Position values. Then pad it about 3 mm.
Mirror the feature using the Mirrored tool over the XZ plane to create the opposite side.
Step 7: Add Chamfers and Fillets
Chamfer the Circular Edge
-
Select the outer edge
-
Apply a Chamfer: 2.75 mm
Fillet the Corners
-
Select the side edges
-
Apply a Fillet: 6 mm
-
For larger curves (e.g., side supports): Apply a Fillet of 19–20 mm
Step 8: Finalize Your Model
-
Hide the image planes and distance measurements
-
Set the body transparency to 0
-
Review the model to ensure everything matches the reference
Congratulations! You’ve successfully completed this FreeCAD part using reference images, sketches, and design features.
Reference Images and Video
The reference images are for the video exercises mentioned above hosted on my Youtube channel. Some of the images are taken in not the best composition and quality. This has been done on purpose to help you understand the challenges that may occur when tracing such subjects.


Your an excellent trainer
ReplyDeleteIf they keep changing freecad interface, you'll have to create new tuts for every big update because it would become barely unrecognizable from the ones in the vid, haha. Thanks for your detailed teaching and dedication bro, truly inspiring! Keep going!!
ReplyDeleteYou are the best :)
ReplyDelete👍
ReplyDeleteTHANKS. This is the best trainingsvideo's i've seen so far. Because Freecad had some updates and differances sometimes it is a little tricky to find (like image import) but if you read the blog it is all there.
ReplyDeleteStill for me as a complete new beginner in 3D this is the best training.
What i do like is; the repetition and yo are not clicking to fast without a explanation.
My only problem was at one point i did not see my design. Could not find it. So made the part again (good exercise :) )and later on i found my fault.
If i pressed the spacebar it would have turned my disign on.